Before you read this article, please note: the easiest way to install WordPress on SQL Server or SQL Azure is to use the Getting Started page. If you’re still having trouble or want more details, read on!
These instructions assume you’re installing WordPress on Windows 7 or Windows Server 2008 or 2008 R2. If you’re installing WordPress in a Windows share hosting environment, many of these same concepts apply.
Here’s a summary of the steps:
- Install the Prerequisites
- Configure a Database
- Download the WordPress on SQL Server Distribution
- Configure IIS
- Install WordPress
- Remove IIS Detailed Errors and Configure URL Rewrite
1. Install the Prerequisites:
Use the Microsoft Web Platform Installer. Be sure you have:
- II7 or above (Windows Vista, Windows 7, Windows Server 2008, Windows Server 2008 R2)
- PHP 5.2 or above
- SQL Server Express 2008 w/Tools or above
- PHP Driver for SQL Server v1.1 or above
- URL Rewrite 2.0 or above
Get Products with Web Platform Installer
Click here to install all these products with the Web Platform Installer.
Click on the Get the Microsoft Web Platform button and accept the prompts to install WPI.

Click on the bar at the top of the browser to install the add-on.

Follow the onscreen prompts and grant permission for the site to open WPI.


Once the Web Platform Installer downloads and installs all the prerequisites, it will prompt you to configure your SQL Server Express install.

Choosing Mixed Mode Authentication and providing an (sa) password will make your web development easiest.
The Web Platform Installer will now download all the bits and prerequisites.

Once the download is complete, it will automatically install and configure the software.

Now you’re ready to run web applications on the Microsoft Web Platform.
2. Configure a Database:
In this step, you’ll create a database and a database user for your WordPress install.
Start by running SQL Server Management Studio from your start menu.

You’ll be prompted to log on to SQL Server.

Connect to your database using Windows Authentication and SQLExpress for the Server name.

Create a new database Login by expanding the Security. Right click on Logins to select New Login.

Supply a Login name; select SQL Server authentication; provide a Password and uncheck User must change password at next login. You can leave the rest of the defaults.
Now you need to create a database.

Create a new Database by right clicking on Databases to select New Database.

Enter a Database name and specify the Login name of the user you created above.
Now you’re ready to proceed with the WordPress install.
3. Download the WordPress on SQL Server Distribution
Go to the Download page or patch page and select the standard or Multi-User Distribution from the box on the right side of the page.
This will take you to the SourceForge download page for the current version.

If you try to save the ZIP file directly to your IIS directory, you’ll probably get a permissions error like below.

Save the ZIP somewhere else on your machine, extract the files and copy them into the
C:inetpubwwwrootwp-sqlsrv folder.

4. Configure IIS
The most common issue I’ve discovered involves WordPress’ use of HTTP errors.
Enable IIS Detailed Error MessagesWhen trying to install WordPress for the first time,you might get an IIS 500—an internal server error that says,“There is a problem with the resource you are looking for, and it cannot be displayed”.
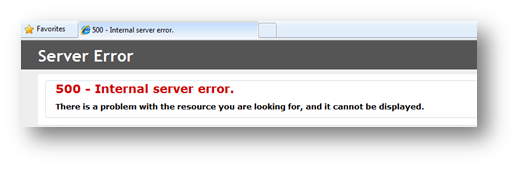
WordPress is designed to throw an HTTP 500 error if a wp-config.php file is not detected. The problem is that the default install of IIS 7 is overriding HTTP errors for external users as to now show detailed information about the server.
You can temporarily override this behavior during the installation process by telling IIS to show Detailed errors. Do this by creating a web.config file in the root of your WordPress install with the following content:
<?xml version="1.0" encoding="UTF-8"?>
<configuration>
    <system.webServer>
        <httpErrors errorMode="Detailed"/>
    </system.webServer>
</configuration>
Grant IIS Write Permissions to WordPress Folder
Next, you need to ensure your IIS has write permissions to your WordPress installation folder.
NOTE: If IIS does not have write permissions to your WordPress folder you will get caught in a loop where you enter your database credentials then get taken back to the initial installation screen.
By default IIS runs as IUSR so you must add this user with Write permission through Windows Explorer. Browse to the installation folder, right click on the wp-sqlsrv folder and select the Security tab.

Click the Edit button, select Add, then type IUSR for Enter the object names to select. Click on Check Names and IUSR should now be underlined.

When you click OK the top window will close. Make sure to give this user Write permissions by selecting the checkbox.

5 5. Install WordPress on SQL Server
Browse to the root of your WordPress install, which in my case is http://localhost/wp-sqlsrv/.

Follow the prompts until you’re asked for database information.
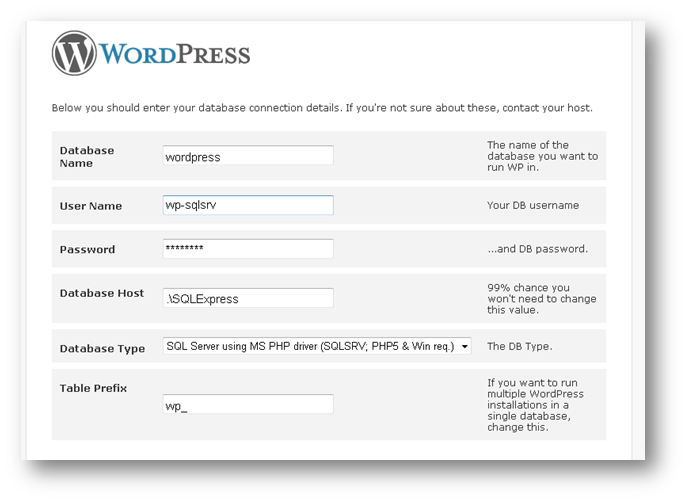
Specify the Database Name, User Name and Password you created while configuring the database. For the default SQL Server Express install, you will enter .SQLExpress for the Database Host.
Select the sqlsrv driver for Database Type. This will use the PHP Driver for SQL Server, which was developed and maintained by the SQL Server team.
You should see the screen below, with an option to Run the install.

If you don’t see this screen and are taken back to the first screen of the install, that means your web server doesn’t have permission to write to the directory (See step 4).

You can get information on IIS security here.
If the install is moving forward, you’ll just need to enter your blog information and receive the admin password.

Now WordPress should be up and running on SQL Server!
The last step is to update your web.config to remove the IIS Detailed errors and enable URL Rewrite.
6. Remove IIS Detailed Errors and Configure URL Rewrite
Remove detailed IIS error messages and add URL Rewrite rules by replacing the contents of your web.config with the following contents:
<?xml version="1.0" encoding="UTF-8"?>
<configuration>
    <system.webServer>
        <rewrite>
            <rules>
                <rule name="wordpress" patternSyntax="Wildcard">
                    <match url="*"/>
                    <conditions>
                        <add input="{REQUEST_FILENAME}" matchType="IsFile" negate="true"/>
                        <add input="{REQUEST_FILENAME}" matchType="IsDirectory" negate="true"/>
                    </conditions>
                    <action type="Rewrite" url="index.php"/>
                </rule>
            </rules>
        </rewrite>
    </system.webServer>
</configuration>

1 Comments
MGM, Casinos, Poker, Slots, Games - JTM Hub
ReplyDeletePlay 충청북도 출장안마 the 김제 출장샵 best slot games at JTM 서울특별 출장안마 and earn points for online 전주 출장안마 slot games. Get the most 제주 출장샵 out of your online Vegas casino experience with JTM Rewards®.
Please add nice comments or answer ....